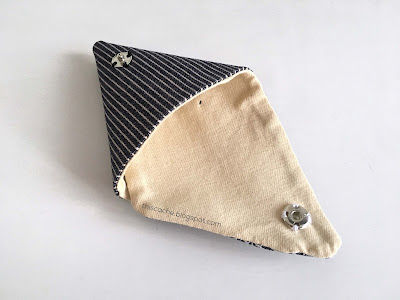
Simple, minimalist and triangular. This easy coin pouch tutorial was something that I created for the boyfriend to organise and carry all of his coins in his pocket. I was bothered by the manner in which he dumped his wallet/all his coins/receipts into his pocket and so I just had to get that sorted.
Messy boyfriend, sounds familiar anyone?
To be honest, this pouch could be used for anything, from storing coins, to sweets, to earphones. Part of the appeal of this is having the flexibility of deciding your own fabric combination. What you choose will depend on who is the end user and what would suit the user in terms of style and tone.
TO GET STARTED:
Supplies Needed:
- 2 Pieces of Fabric - Canvas or Cotton.
- Fusible Interfacing (this is used to stiffen soft fabrics).
- Paper Pattern
- Snap Fasteners
Cut out rectangles out of the 2 fabrics and interfacing that are approximately the same size as the pattern. Here, I am using the blue striped fabric as the outer material of the pouch, and the canvas as the inner lining.
I have already traced out the shape of the fabric to be cut using a pencil, based on the paper pattern.
(Hold on till the end!!)
If you skip the pressing cloth, you may end up with fusible interfacing stuck to your iron. This is definitely not something you'll want happening to you, so do check that your pressing cloth is covering the entire piece of fabric and interfacing.
 |
| My fabric and interfacing shifted a little. |
Next, pin the 2 layers together making sure that the right sides are facing each other and cut out the fabric according to the paper pattern. To make the pouch, sew the seam all around along the edges, leaving about 1/2 inch sewing margin (see red dotted line).
Take care to leave about 1 - 2 inches un-sewn to allow for the pouch to be flipped inside out, thereby hiding the seam.
 |
| Flipped! |
Now, you'd have to do a hidden seam to close up the gap and complete the body of the pouch. However, being the forgetful person I am, I did not manage to capture photos of that process. Feel free to google for tutorials on sewing a hidden seam, OR, you could just watch this one here:
To put the finishing touches on the pouch, prepare 2 snap fasteners and sew them onto the body of the pouch. DO take note of the positions of the male and female fasteners.
Hope you guys loved this pouch as much as I do. I gave it to the boyfriend the other day and he loved how simple and unique it looked. I am hoping he would put it to good use, or else my efforts would have gone to waste.
For those who would be trying out this tutorial, do let me know how it went! I want to see all your creative creations :)
xoxo,
meixii
You might also like:
 |
| DIY Envelope Laptop Bag |


Comments
Post a Comment
Thank you for your comment!
I really love hearing from you :)